
Last month, I spent an unreasonable amount of time searching through AWS documentation trying to figure out how to:
- host static content…
- …in an S3 bucket…
- …with a custom domain name…
- and SSL (HTTPS) connections.
Given the increasing popularity of static site generators like Hugo or Jekyll, this seemed like something that should be a straightforward process.
If you’re here, you probably discovered that this is not straightforward. You’ve probably also cobbled together a solution from half a dozen different StackOverflow ChatGPT questions and fragmented blog posts. And so: below is my current playbook for how to host static sites with SSL on AWS.
Step 1: Transfer Domain to AWS / Route53
If you’re going to serve your static content out of an S3 bucket, and you want SSL support, you’re going to need a CloudFront distribution. (CloudFront is Amazon’s CDN service.) Technically it’s not mandatory that your domain name registration be held at Amazon, but it makes several steps easier. And so, the rest of this playbook assumes you’re able and willing to transfer your domains to AWS.
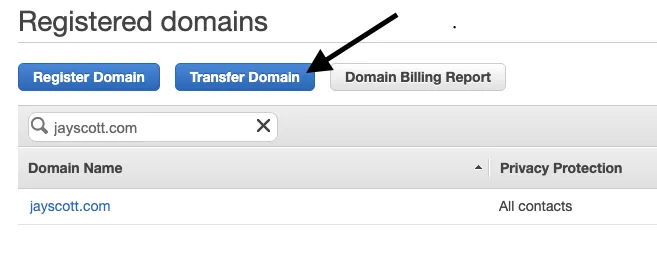
Transfer Domain in Route53 → Registered Domains screen
From your AWS console, head over to Route53 → Registered Domains and either confirm that your domain is already there or hit Transfer Domain to initiate the registration transfer. [Alternate path: setup a Hosted Zone in Route53 that exactly matches the zone settings at your current registrar, and point the domain’s nameserver settings to the servers listed in the NS record in your Amazon hosted zone.]
Step 2: Create Custom Domain SSL Certificates
Great! Your custom domain is ready to “secure.” Next, you need to request a certificate from AWS Certificate Manager (go find it in the console Services list). This is pretty fast, and free:
- Click Request a certificate
- Select Request a public certificate (you want a cert that can be used by the outside world)
- Enter two records in the Domain name edit box:
yourdomain.comandwww.yourdomain.com.We’ll be using this certificate on two separate CloudFront distributions. [Alternate path: if you have other subdomains you’re using to access the static content, you will, of course, want to enter those here.] - Select DNS validation (this lets Certificate Manager authenticate your usage of the domain by auto-generating a record in Route53)
- Feel free to add custom tags to the certificate if you like.
- Click Review, then Confirm and request.
Once the certificate request has been initiated, you can add a CNAME record to your domain’s hosted zone for each of the certificate paths. Or - even easier - just click the button and let AWS insert the record for you.
Step 3: Setup your S3 Bucket Content
While we wait for the SSL certificate to generate (this can take a few minutes), we can head over to S3 and setup our buckets. You’ll need two buckets:
mydomain.comwill contain all of the static content you want to host; andwww.mydomain.comwill redirect traffic tomydomain.com
[Alternate path: if you want your traffic to be served from www.mydomain.com, just flip the instructions around below.]
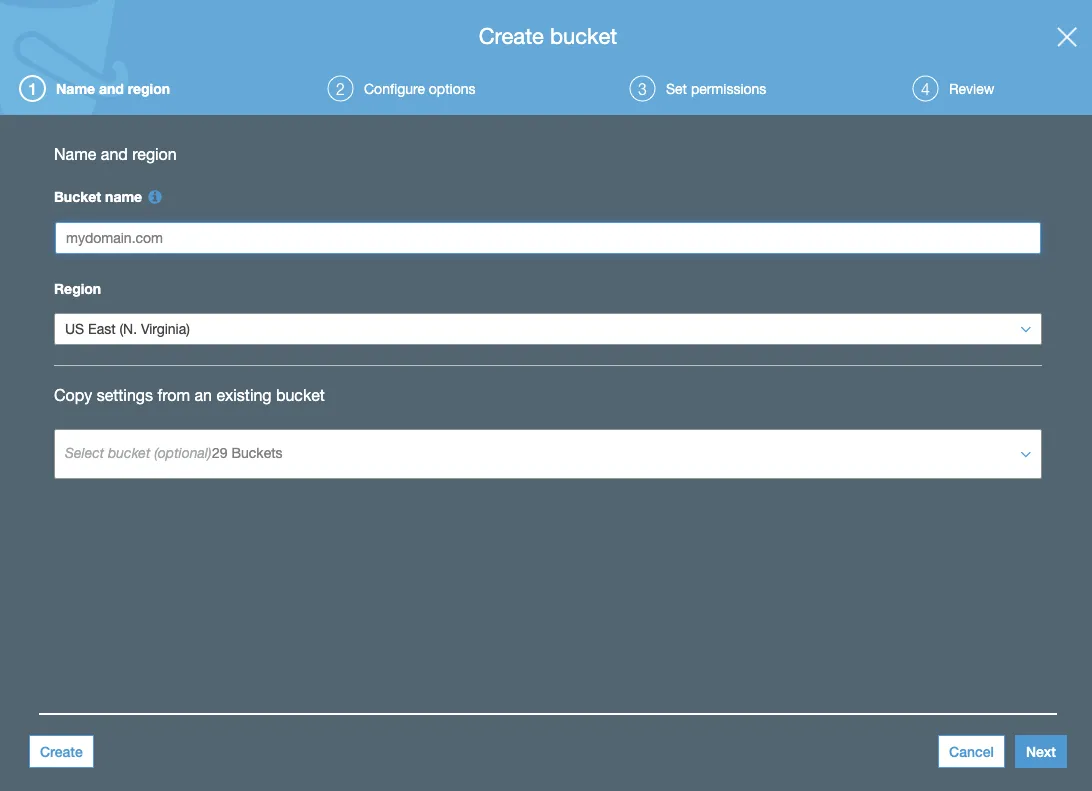
Enter your domain name as the name of the bucket
First, create your content S3 bucket (mydomain.com in the example above). You can use your domain name as the name for the bucket if you like, but since we’re going to be putting a CloudFront distribution in front of it that’s not a technical requirement. You don’t need to configure any special options on the next screen of the bucket creation flow.
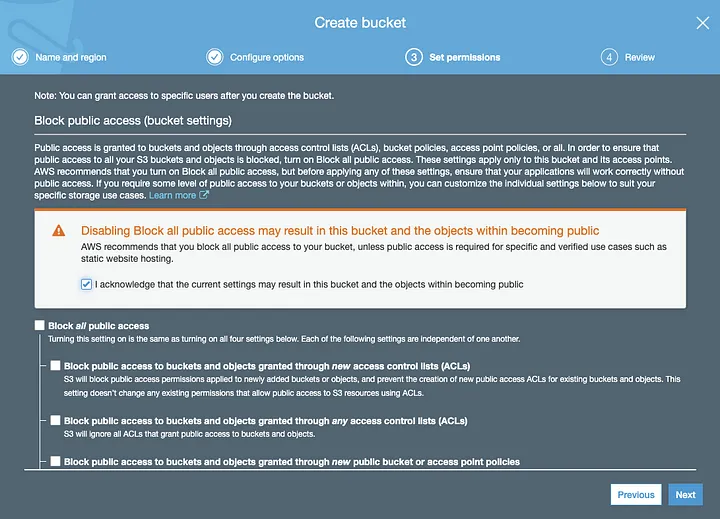
Uncheck “Block all public access” to allow the world to access your content
Be sure to uncheck “Block all public access” so public users will be able to see your content. Amazon has put extra warnings and precautions around this step, after several rather public (embarrassing) data leaks that were caused by lax security settings on open S3 buckets. In this case, however, you do in fact want these files to leak all over the Internet.
Now, repeat the above process for your alternate domain name bucket. This bucket will be used to redirect traffic onto your primary domain.
After uploading your content into your primary static hosting bucket, go to the Properties tab of the bucket and edit the Static website hosting settings. You want to Use this bucket to host a website, setting the Index document to the filename of your default page (e.g., index.html). At this point, you can use the Endpoint in the static hosting settings to test things out.
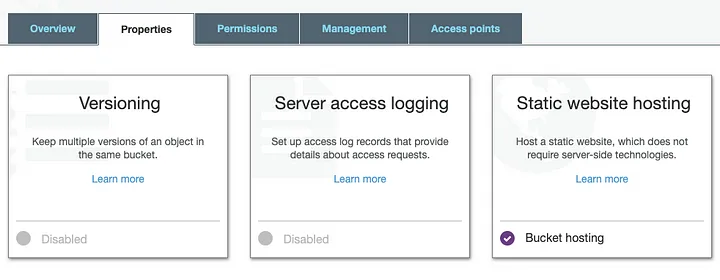
Find the Static website hosting settings in the S3 bucket Properties tab
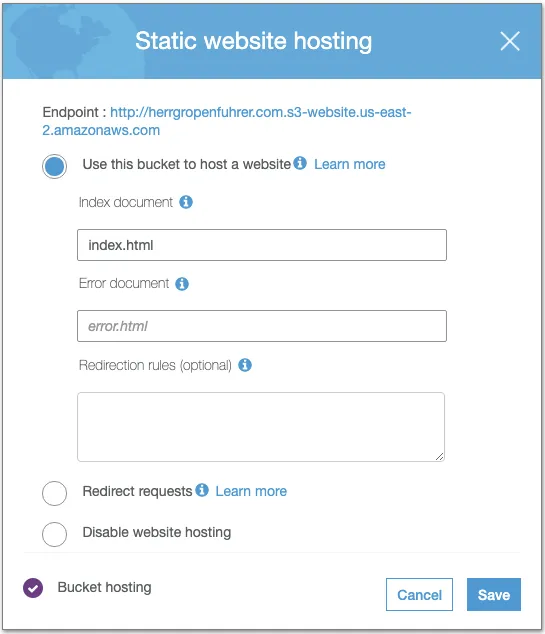
Configure the S3 bucket to host a static website
The final configuration task with your S3 buckets is to go into the Static website hosting properties of your alternate domain bucket (e.g., www.mydomain.com). You want to Redirect requests onto your primary domain, and to set the protocol to https (assuming you want all redirect traffic to be routed onto an SSL connection).
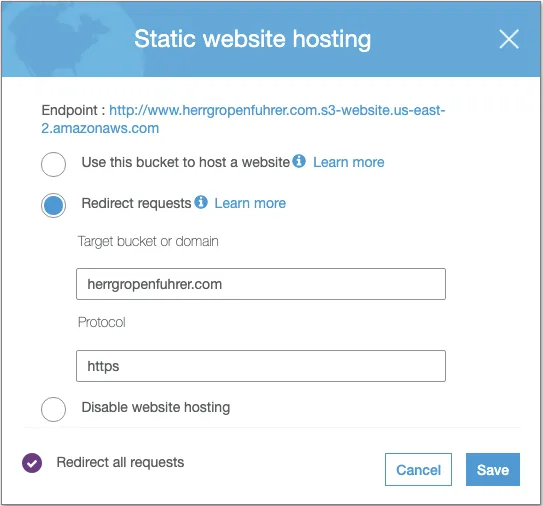
Configure the secondary S3 bucket to redirect traffic to the primary bucket, via HTTPS
Step 4: Create CloudFront Distributions
By now, your public certificates should be ready to use. For this use case, a CloudFront is the connective tissue between a DNS record, an SSL certificate, and an S3 bucket:

The reason for all of this seemingly unnecessary complexity is that CloudFront can handle SSL connections with a custom domain, but S3 cannot. (Perhaps, someday, AWS will get around to building a simpler solution and this entire post will feel quaint.)
We’ll use two separate CloudFront distributions: one to specifically handle mydomain.com, and a second to handle www.mydomain.com. You can accomplish a solution with only one distribution that responds to both names, but the client traffic will be displayed as from either mydomain.com or www.mydomain.com depending on the original request. With the two-CF configuration, requests to the secondary domain name will flow all the way through to the secondary S3 bucket (www.*) and then be redirected to the www-free path.
And so: In CloudFront, create a Web distribution. There are lots of settings in the configuration panel:
- Origin Domain Name says what the source (origin) of the content should be for this distribution. By selecting the control, you’ll see a list of available S3 buckets that can be used as the origin. Select
mydomain.com. - Restrict Bucket Access: If enabled, this option requires all public traffic to be routed through CloudFront. This isn’t a full lesson in CloudFront, but if you want to “lock down” your bucket and guarantee that pages always display at the custom domain name then you’ll want to use this.
- Viewer Protocol Policy: Set to Redirect HTTP to HTTPS to force all connections do use SSL. There is no good reason not to do this.
- Allowed HTTP Methods: Specify which HTTP methods your site requires. For most of my passive content sites, the default GET, HEAD setting is all that’s needed to retrieve content, but if you have POST forms then you will need to adjust this setting.
- Compress Objects Automatically: Do you want to reduce bandwidth? Of course you do! Enable gzip compression.
- Alternate Domain Names: VERY IMPORTANT: you must enter
mydomain.comorwww.mydomain.comhere, depending on which distribution you’re setting up. When a client request hits Route53 and gets routed to CloudFront for distribution, CF will verify that the requested domain is in its domain name list and that the certificate matches that domain. - SSL Certificate: All of the above work comes down to this one setting. Select Custom SSL Certificate and select your recently-created SSL certificate to bind it to the distribution.
- Default Root Object: This stores the default page to request, if no page is included in the request URL. Use the same
index.html-style setting that was used in your S3 bucket settings.
You can now click Create Distribution, and repeat this exercise for your second distribution (for www.mydomain.com) while CloudFront replicates your content to the edge nodes.
Step 5: Update Domain Zone Settings
After your CloudFront distributions are stood up, the only thing left to do is update the DNS settings in Route53 for mydomain.com:
- Update or create an
Arecord formydomain.com. that aliases to the CloudFront distribution formydomain.com. - Update or create an
Arecord forwww.mydomain.comthat similarly aliases to the distribution forwww.mydomain.com.
Step 6: Party Time 🎉
Voilà! You should now be able to visit mydomain.com and www.mydomain.com, using either HTTP or HTTPS requests, and be routed to the same page at https://mydomain.com served from an S3 bucket. (As a bonus, you’ve got a CDN backing it up.)
Depending on how you’ve decided to copy new content to your S3 bucket, you will need to tweak your publishing process to include invalidating the CloudFront distribution for mydomain.com after new or modified files are uploaded.